Contents
What is Bluetooth Interfacing
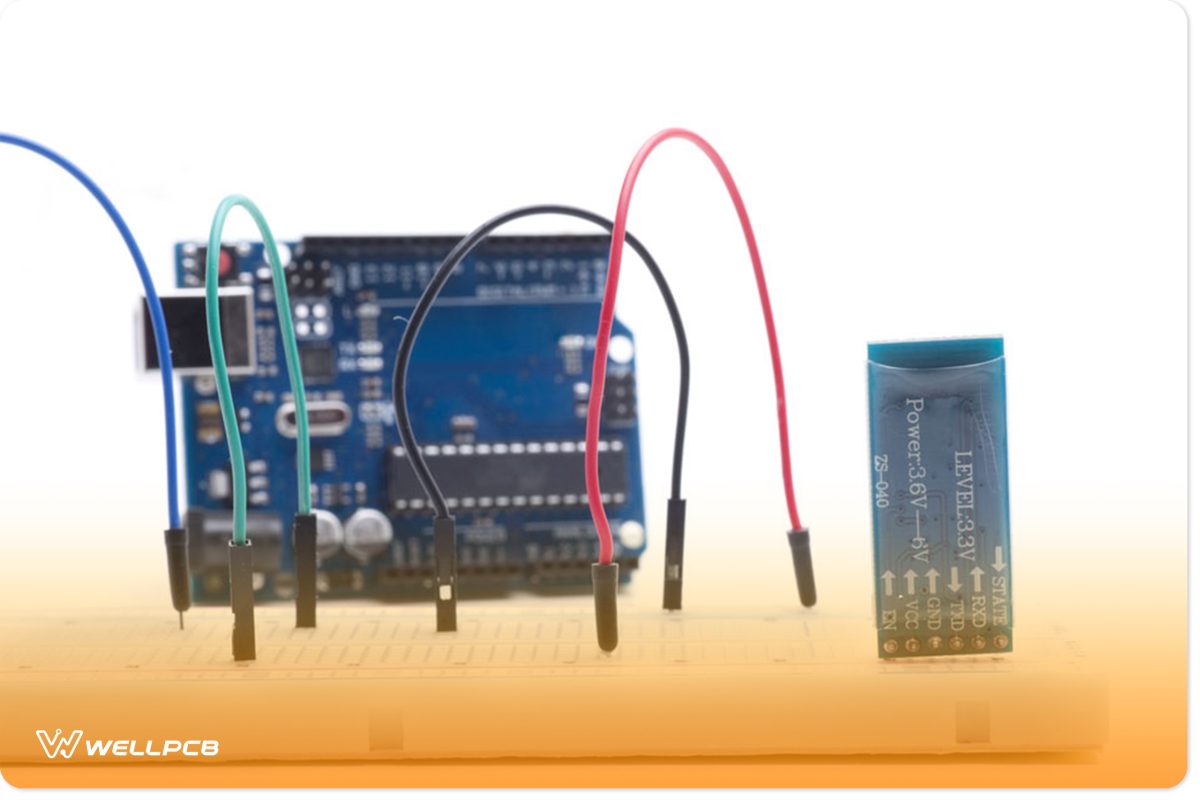
Bluetooth sensor, breadboard, and Arduino Uno
Today, Bluetooth is one of the most ubiquitous wireless connection standards in the world. We use it to transfer and exchange data between devices. Bluetooth interfacing describes using or enabling a Bluetooth device. While we use standards such as Wi-Fi for long-range connections, we use Bluetooth for short-distance connections and data transfer. However, the latest Bluetooth standard (5.2) can reach ranges up to 400m with a data rate of 2 Mbps.
We can expect future versions to achieve longer-range distances with higher thresholds and throughputs. Nevertheless, each time you use your cell phone to transfer data or connect to another device, that is essentially Bluetooth interfacing. Again, many microcontrollers don’t come with built-in Bluetooth functionality. Thus, if you want to achieve Bluetooth interfacing with them, you need to extend them or add another board.
Next, we will show you how to add Bluetooth interfacing to a microcontroller using a Bluetooth module.
Bluetooth Modules and How They Work
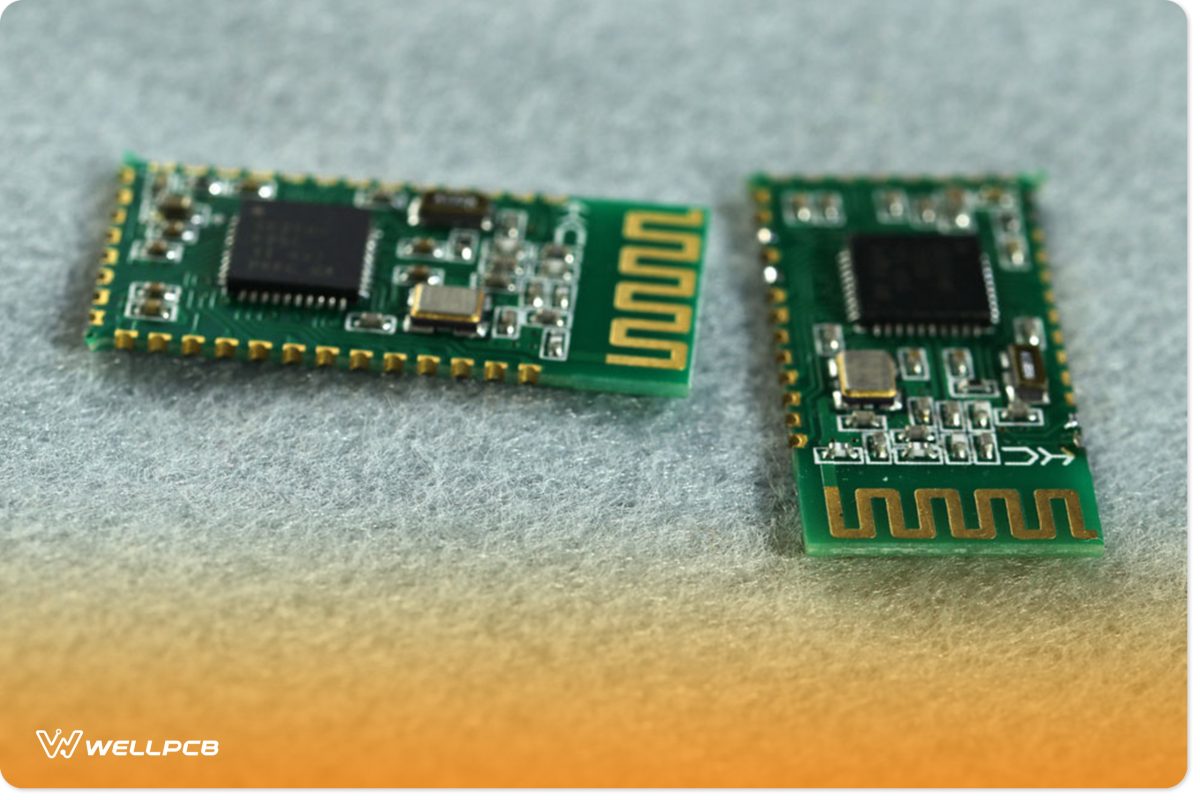
The Bluetooth Modules
Bluetooth modules allow you to interface your microcontroller and single-board computers with external devices. We may also refer to them as Bluetooth sensors. Nevertheless, these devices are only necessary if your board doesn’t have any built-in Bluetooth capabilities. The most common Bluetooth modules are HC-05 and HC-06.
When you purchase a Bluetooth module, you’ll find it as a green rectangle on a square piece of blue breakout board. The breakout board provides the Bluetooth module with pins that allow you to easily plug it into a breadboard.
For simple applications, the HC-05 and HC-06 work identically in their slave modes. However, we suggest you use the HC-05 because it allows you to switch between slave mode and master mode. In contrast, it’s only possible to operate the HC-06 as a slave device. Thus, if you want to connect two Arduino projects, you’d need an HC-05 Bluetooth module so it can initiate a Bluetooth connection and set it up.
The Structure of a Bluetooth Module
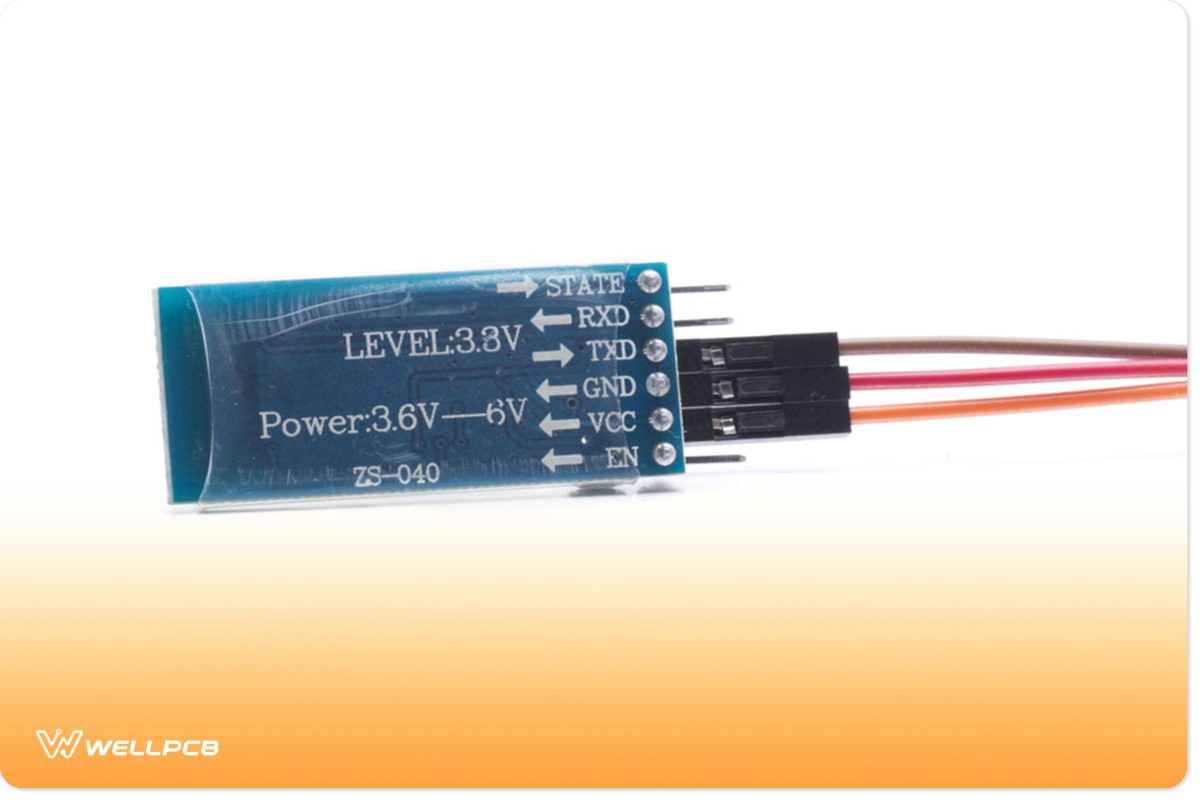
If you look at the back of the Bluetooth module, you’ll find labels for the pinouts. In most cases, all you’ll need to worry about are the power supply pinouts. Mainly VCC and ground (GND). However, in addition to these pins, we also have the data pins – RXD and TXD.
RXD receives data while TXD sends data. If you’re using the HC-05, you’ll notice two pins that the HC-06 does not have. We refer to these pins as the enable (EN) and state output pins (STATE). You may also hear people refer to the enable pin as the key pin.
When working with Bluetooth modules, you need to pay careful attention to the supply voltage. Anything between 3.6 volts and 6 volts is safe. The data pins will require 3.3-volt digital signals.
How To Interface Bluetooth Module With Your Arduino Project and Phone
Bluetooth sensor
To show you how Bluetooth interfacing works, we have included a basic tutorial on how to connect your Arduino project to your mobile phone using a Bluetooth module.
Components Required
- Bluetooth Module HC-05 or Bluetooth Module HC-06
- Breadboard
- Arduino Uno
- 2.2kΩ Resistor
- 5.7KΩ Resistor
- Solid core wires
- Arduino IDE software
Instructions
Setting Up The Hardware
- Connect wires from the 5V and GND pins on your Arduino Uno, fit them to the power rails on your breadboard, and then feed them to your Bluetooth module, connecting to the VCC and GND pins.
- Connect the transmit pin from your Arduino Uno to the breadboard while using your resistors to create a voltage divider in series with GRAND. The center should tap off and connect to the RXC pin. This is because the Bluetooth module requires a lower transmit voltage level.
- Feed the TXD pin on the HC-05 by routing a wire through the breadboard from the receive pin on your Arduino Uno.
If you follow the above wiring steps correctly, your project should look something like this:
Setting Up The Software
For our project to function correctly, we need to write code that will allow us to listen to data and receive it from a Bluetooth source. We’ll then print out the result back to the computer using our serial port.
So, we’ll essentially use this project as a Bluetooth receiver for the computer. Thus, we must write a sketch for the Bluetooth terminal.
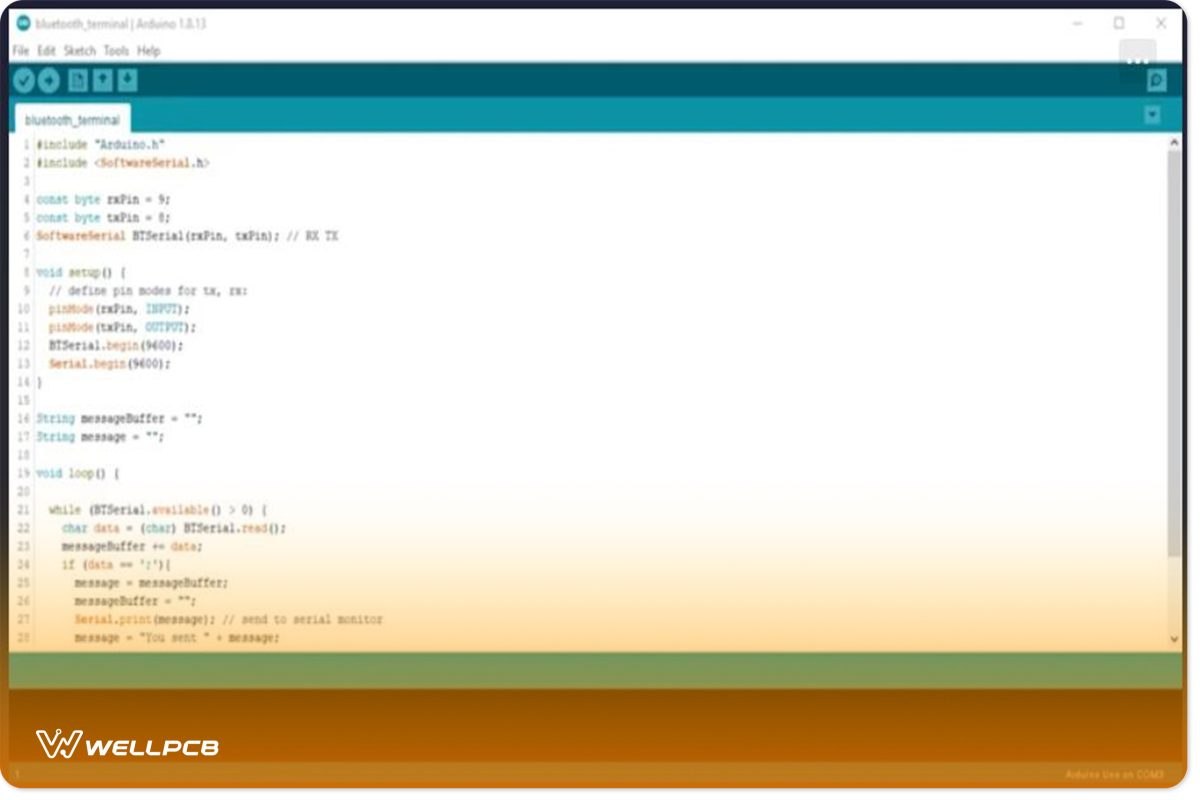
Bluetooth terminal sketch 1
Step 1
We need to use a few functions and classes from the Software Serial library. They will allow the Arduino to communicate over Bluetooth. Thus, you must include it in the sketch.
Step 2
Once you’ve imported the library, you need to specify which serial pins you’re using to send and receive data. In our example above, we’re using Pin 9 for our receive pin (rxPin) and Pin 8 for our transmit pin (txPin).
Step 3
Next, instantiate a software serial (SoftwareSerial) object using the values we defined in the previous step as arguments. In the above example, we named our software serial object BTSerial.
Step 4
Next, define a new function called setup. It defines which pins are for input and output. By default, the HC-05 Bluetooth module communicates to the Arduino at 9600 baud; we can modify that. However, we kept it the same in our example because it’s closer to the accurate baud rate.
Step 5
Next, define two String variables that we’ll use for messages. Finally, create an Arduino loop function with a while loop. We’ll use this loop to listen for any communication between the Arduino and Bluetooth devices.
If the Arduino receives any data, it will print it out using a semicolon as the line terminator.
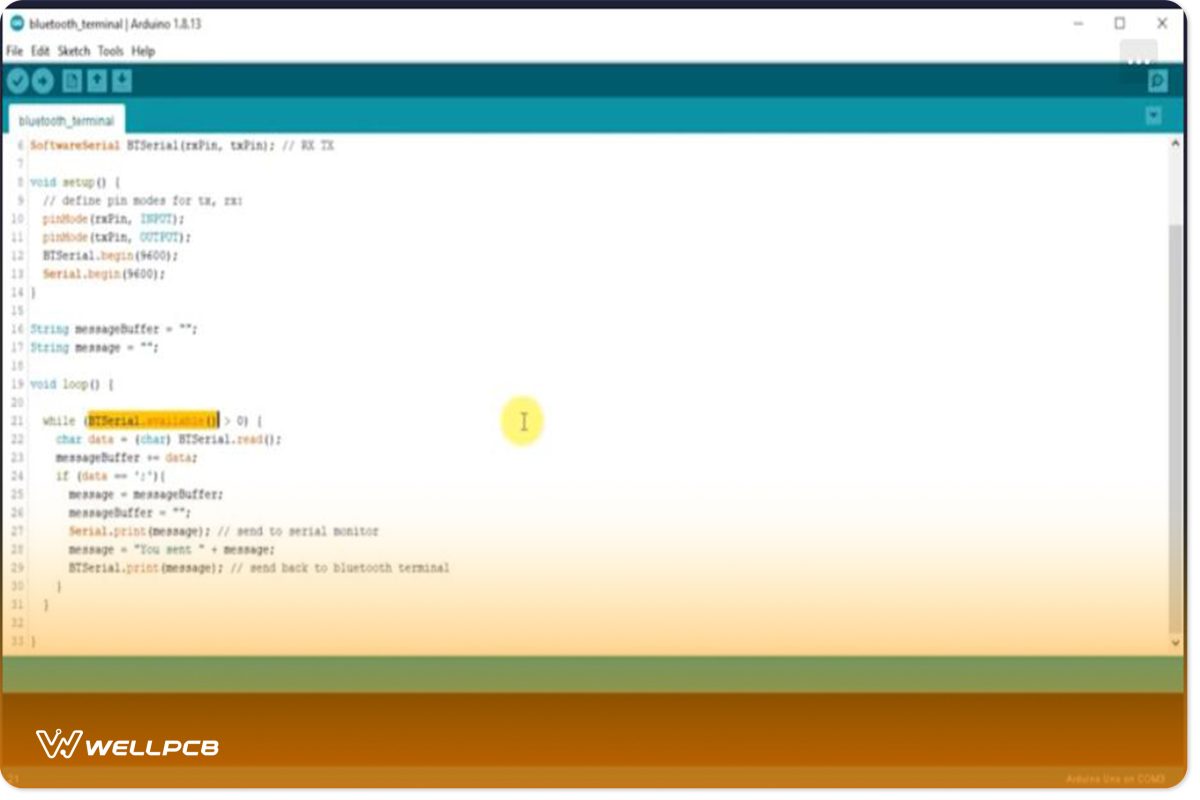
Bluetooth terminal sketch 2
Once you’ve written the sketch, you need to upload it to your Arduino. Next, you’ll need to pair your phone to your Arduino project. This will allow your mobile phone to communicate with the Bluetooth module.
Communicating with the Bluetooth Device
When you turn on the Arduino using the button switch, you should notice a flashing red light from the Bluetooth module. This suggests that it is in pairing mode. You need to go into your phone’s Bluetooth settings and scan for any nearby devices.
Under available devices, you should see an entry that relates to your module. Select the entry and pair it with your phone. It will ask you for a pairing code. The pairing code is usually “1234”. Now that you’ve paired the device, you can start communicating with it. However, you’ll need a mobile application to do so.
Navigate to your phone’s app store and download a serial Bluetooth Terminal app. The application needs a terminal that allows you to type messages and then send them to your project. Additionally, you also need to be able to see notices that you receive from the device.
Ensure that the app you decide to use is compatible with classic Bluetooth (Bluetooth Classic), or it may not work with your project.
Once you’ve downloaded the app, go back to your computer, open the Arduino IDE and open the serial monitor for the Bluetooth sketch. Make sure that the serial monitor is using 9600 bauds or the number of bauds you specified previously.
Go back to the Bluetooth terminal app on your phone and select the Arduino Bluetooth project as a device. Once it connects, you can type a message into the terminal application. Ensure you add a semicolon (;) at the end of the message to signify the end of the message.
Summary
If you follow the above steps correctly, you should receive an output informing you that the Arduino project has received a message. The message should also appear on your computer’s screen through Arduino IDE’s serial terminal. Again, this is a simple project that is suitable for novices and beginners. Once you understand the basics, you can pursue more complex projects. For instance, you can add a push button, onboard LED, or DC motor. You can even use it to send posts via email. Nevertheless, we hope that you’ve found this guide to be helpful. As always, thank you for reading.


