
Contents
What Does PCB Repair Entail
With PCB repair, it goes beyond the soldering iron. Generally, it involves cutting traces and adding jumpers to the damaged or faulty board. It also entails drilling out vias on the board and adding some glued parts on the board. Ideally, circuit board repair ensures that a damaged PCB will restore its original function by adding or adjusting certain aspects of the printed board. As we shall also see, sometimes it is better to buy a new component rather than attempt repairs on some of the faulty PCBs.
When it comes to repairing these boards, it is crucial to understand that different boards or damages on the boards will require different repair parameters. For instance, a circuit board that got burnt by fire will be harder to repair than a machine rendered faulty by electrical short-circuiting. Depending on the cause of damage, repairs are possible for some PCBs, while some are not.

PCB Damages and Repair
Every PCB damage is not a result of similar conditions. With the variation in the environmental stress that might cause damage, it is essential to understand what is causing the problem to find a solution. It would be necessary to look at the possible causes that might render a functional PCB damaged.
Possible causes of damage to PCBs
• Heat and Humidity- Mostly with fire, most PCBs will not be easily repaired, but also this will depend on the extent of the damages caused by fire. You will find it very difficult to restore such damages, and you should opt for a new PCB when the damages are beyond repair.
• Static Electricity- This is the imbalance of electric charge within the PCB. So, let’s say during an electrical surge, for example, the traces in a PCB are likely to face damage. Hence, it is essential to switch off your devices during electric surges
• Physical impairments- Some physical damages might occur to a PCB when exposed to stress and might cause a break, wear, or tear. When a PCB accidentally falls, this is likely to cause damage to it, and we need to learn how to repair the damaged PCB.

PCB Repair rules
So when the PCBs are faulty or damaged, how do you know which you can repair and which boards are beyond repair? Let’s look into some of the necessary repair rules.
• PCBs with simple or slight damages can be easily repaired.
• Depending on the PCB functionality issues, does repairing the PCB solve the problem or not? For instance, short-circuiting or open circuit.
• Some electronics’ PCBs are restricted for repair.
• Lastly, not all base materials of PCBs are suitable for repair.
When you understand these basic rules of circuit board repair, you are good to go about replacing your PCB.
How to Diagnose a Faulty PCB
How to assess a faulty PCB depends basically on the causative agent of the damage. As discussed above, let’s discuss how you will diagnose a PCB and rule out a specific error.
Physical damage- When parts of the PCB break, maybe by falling on the ground and shattering, but the component is partially working, repair on this PCB is possible, mostly through remanufacturing.
Component failure- Using voltage tools to measure the conductivity within the circuit board, you can tell whether electricity is being conducted on the board or whether the board has completely failed.
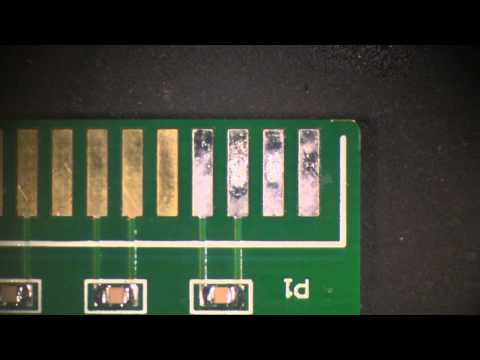
Trace damages- You can assess the damage by scanning its pathway, provided that the trace is visible enough. Their composition of bright materials, usually copper or silver, makes them highly visible. Though some are thin, and it might be challenging to assess them.
Poor PCB design- This doesn’t take a genius to tell. A shoddy PCB will consistently fail no matter how well you repair it. Ideally, you should buy a new PCB instead of further seeking repairs; it will save you time and energy spent improving the poor PCB design.
Power failure- Though similar to the component failure I noted above, you should check for current on the board using the voltage tools, then you can quickly tell what is repairable and what is not.

How to Repair a Broken PCB
As we have seen above, whether a PCB is repairable or not depends entirely on the basic rules of PCB repair and the causes of the damage. Let us dive into how then we can repair a faulty or broken PCB, for that matter. It is very understandable how PCBs have revolutionized the electronic world compared to the old days when we used to have wires in place of printed circuits. With the cables, it was a little bit easy with repairs that resulted from physical damage, but with PCBs, the repair process can be somehow frustrating if you are yet a beginner. So, here are some of the steps that you need to follow.
Steps to follow while in circuit board repair of broken PCB
1– Identify the damaged component and purchase a suitable replacement. In most electronics, use a voltage regulator to maintain a constant voltage level. However, active components with specific functionality should use the same part to replace the faulty one.
2– Place the board on a flat surface and fasten it to ensure that no movement happens during the repair.
3– Turn the Hot air gun on, and hoover it approximately 6 inches over the damaged component.
4– Using tweezers, carefully pull out the component that needs repair from your circuit board.

5– Turn on the soldering iron and let it heat up to 450◦ Celsius.
6– On the pad that the component is taken from, place a copper braid on it and heat it using the soldering iron’s tip.
Using an alcohol swab, clean the pad and its surrounding areas.
Line up the pads on the board to match up the new component. Then you ensure that it has the correct orientation before joining them.
Finally, join all the leads and pads with a soldering iron, and you are good to go.
You should note that this type of repair works perfectly for almost all sorts of damages on the PCB. You should also not attempt to repair PCBs that manufacturers have given a warning against repairs of its components.
–Tools to have when during PCB Repair

The following is a list of equipment you should have when attempting any PCB repair.
- Hot air gun
- Solder
- Alcohol Swab
- Soldering iron
- Copper Braid
- Tweezers
Conclusion
As we have seen above, it is crucial to ascertain the cause of damage to the circuit board before attempting any repair. Every PCB has its parameters that you should check to rule out the specific problem that you will attend to. So, if you come across a faulty PCB, I believe that you will readily participate in it, as we have discussed above. All the best in your future circuit board repairs!
References


