Contents
PS4 Controller PCB Circuit Board Texture
To make your PS4 Controller, you must understand how standard controllers and their circuit board texture work.
That way, you will know what the console expects, so you can ensure that your custom build will work.
Initially released in 2013, the Sony Model CUH-ZCT1 PlayStation 4 Wireless Controller, also called the DualShock 4, is a wireless control pad for PlayStation devices.
Compatible with PlayStation 3 and the PlayStation 4, the Controller can connect to the central console through a Micro USB-B cable.
The Controller also included a headphone jack, a built-in Mono stereo, and a two-point touchpad.
Video game consoles are some of the most purposely designed devices in the world.
While you can use them as personal computers, their primary function is entertainment.
And you can see this throughout their design and components.
Because of this, consoles, and by extension their controllers, often have obscure and proprietary circuit board textures and components, and the PlayStation 4 is no different.
The central console uses standard computer-printed circuit boards (PCBs), but the controllers require specialized circuits.
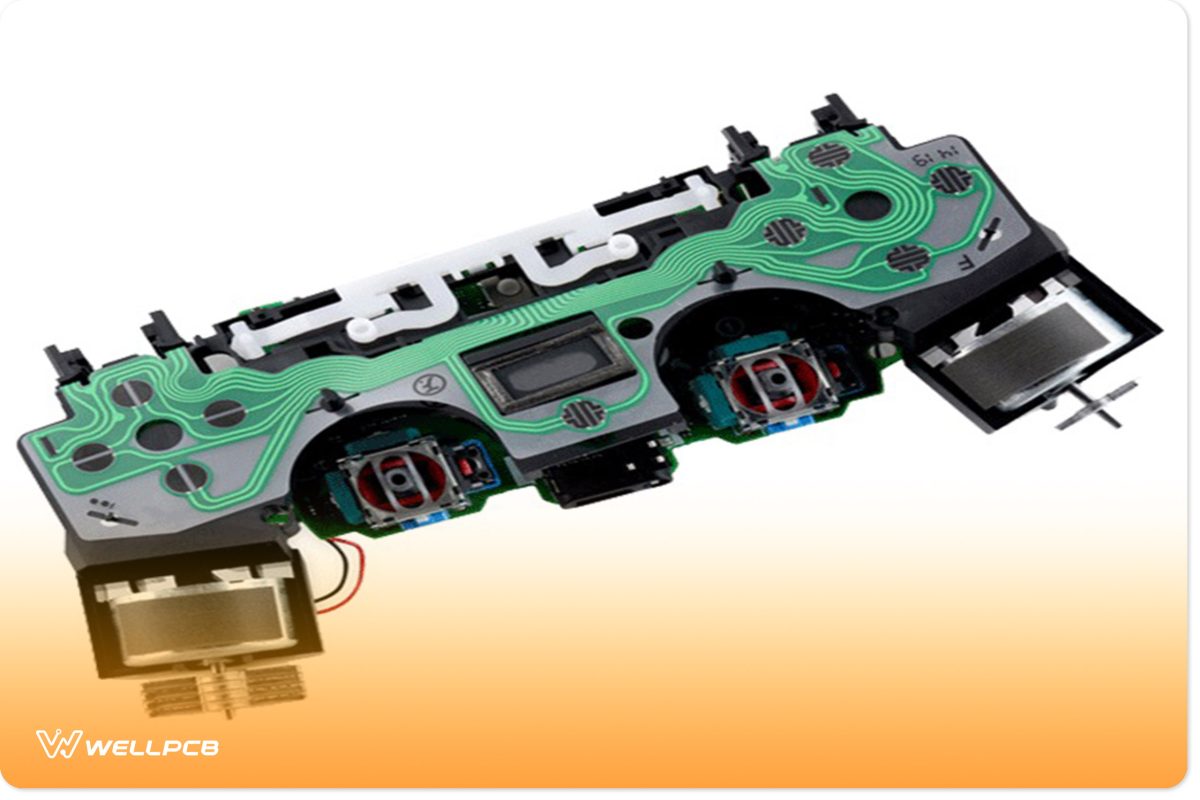
For the most part, the flexible, ribbon-like PS4 Controller circuit board texture is no different from any other PCB.
It consists of light, highly durable, nonconductive, fiberglass-like material.
Another nonconductive layer covers this base plate with securements for attaching the board to the Controller’s plastic shell.
Finally, a layer of conductive copper sits on top of both to serve as the PCB’s circuit paths.
A non-conductive, protective solder mask surrounds the entire assembly with enough open metal solder points all over the board.
All the Controller’s buttons, triggers, and Control sticks attach directly to this top circuit board texture.
In a PS4 controller, this board is split into two panels stacked on each other, with additional panels for a USB port, a wireless antenna, a heatsink, and a battery.
These two PCBs are spread throughout the controller shell and positioned to make suitable and effective contact with the button keys.
This contact happens through conductive rubber plates affixed to the bottom of the buttons. These plates complete the board’s circuit when you press the buttons.
PS4 Controller PCB Layout
The PS4 Controller must sit comfortably in the hands of the player. The player must hold it, move the control sticks, and reach and press the buttons.
This business restriction dictates the dimensions and layout of the PCB’s circuit board texture.
The two-PCB format is one such consequence. The DualShock 4 daughter PCB handles all user interactions. It has all the buttons and trigger switches.
The controller PCB also has an LED video game health indicator that shines green for its whole life and red for low energy.
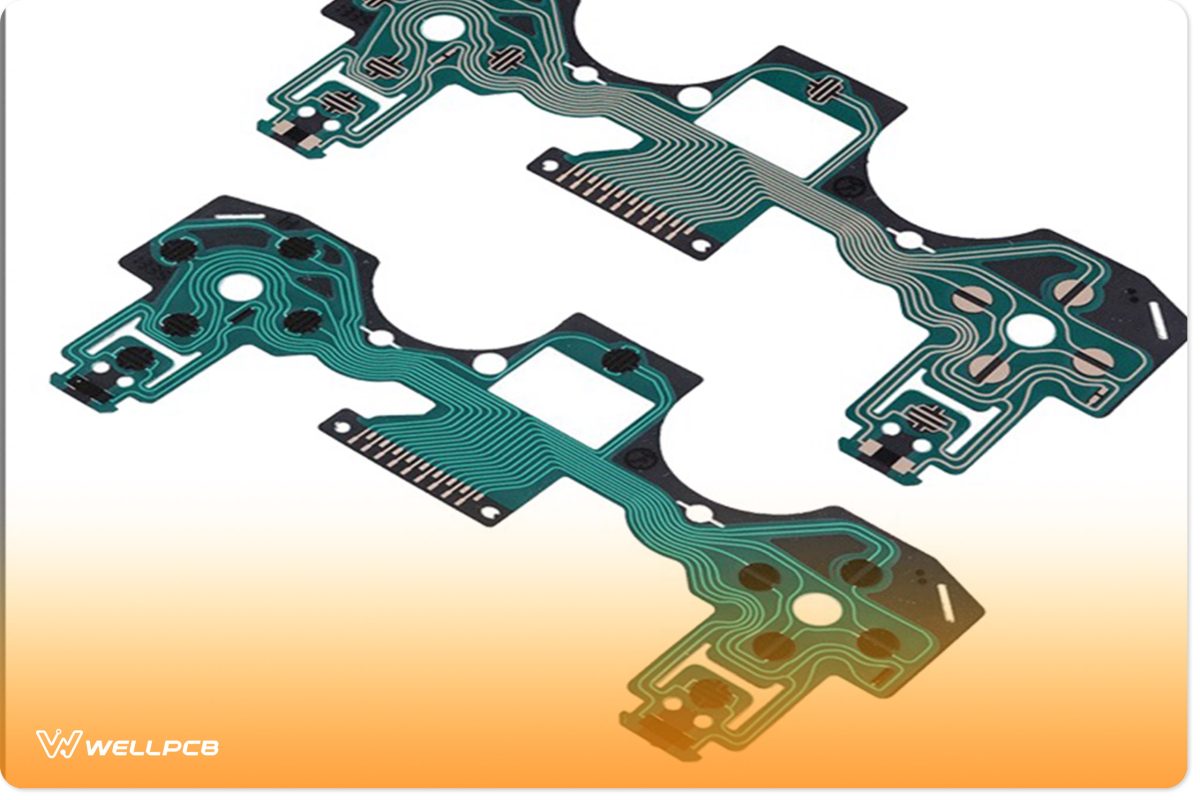
The Controller’s main PCB has all the basic computer logic, connectors, and potentiometers that hold and read the analog sticks.
It has all the features and parts of a typical smartphone with its processor, USB, and network connections.
The mainboard also has a three-hour backup battery, metal mounting brackets, and a cooling fan assembly.
PS4 Controller PCB Board
Over the years, Sony released seven variations of the DualShock 4 controller. While they look the same outside, their boards have different circuit board textures.
Each layout improved the previous model by providing more efficient buttons and input methods.
Each variant has regular and pro circuit board textures, but these versions use the same PCB. The Pro textures have extra connectors on them.
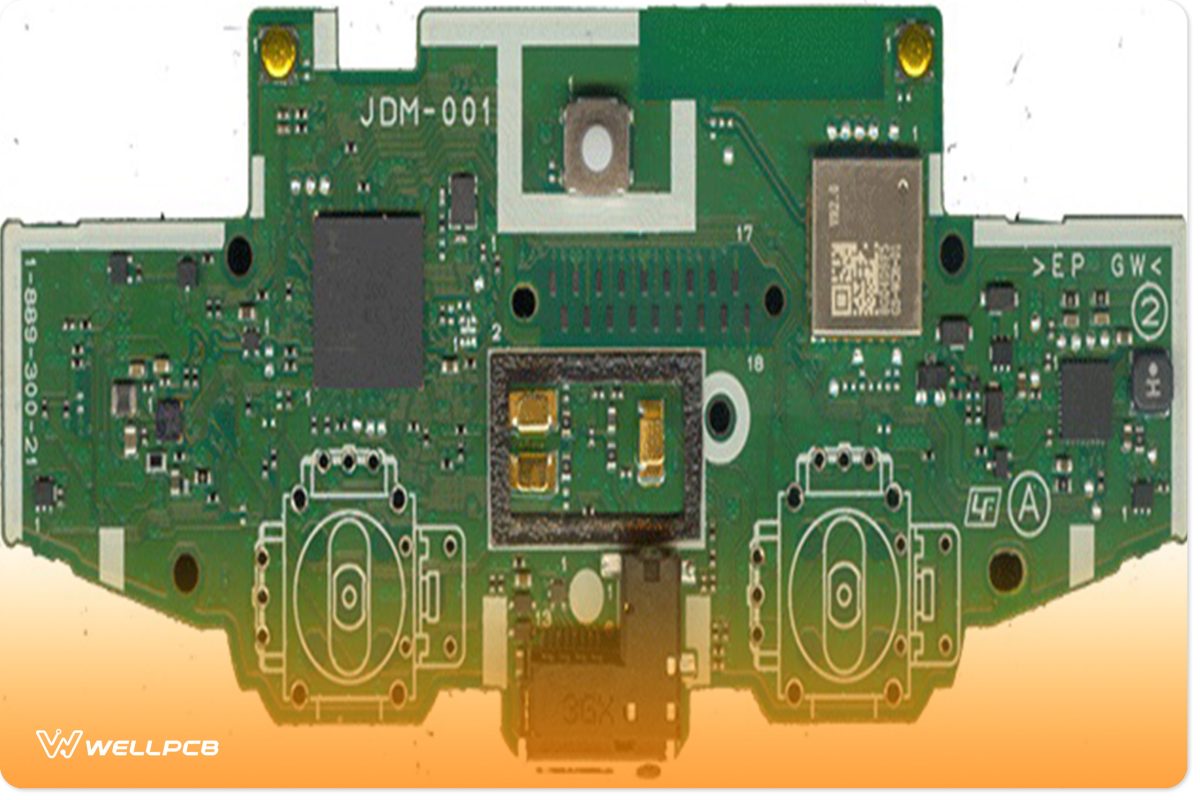
JDM-001
As the console launch version of the Controller, Model Number JDM-001 is the five’s most detailed circuit board texture.
Found in green or blue, the 001 has all its button switches in its “active” states.
The D-pad, Cross, Circle, Square, and Triangle buttons do not require anything else to function. This means you can make them work by connecting them to any ground.
However, it would help if you took precautions with the triggers.
“Left 1” and “Right 1” trigger buttons are active, but you must connect them to the 3.2-volt line to work.
On the other hand, the “Left 2’ and “Right 2” triggers require a pulse width modulation (PWM) signal.
JDM-011
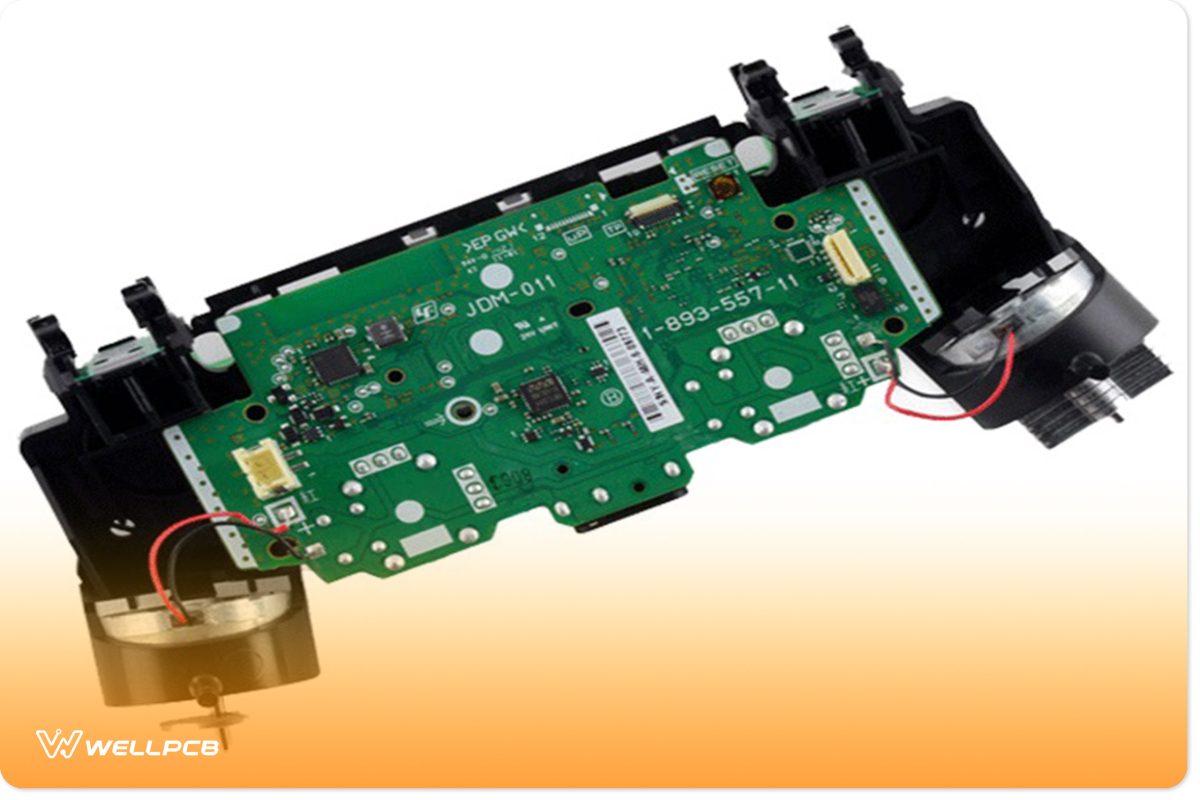
The second circuit board texture is smaller than the 001, with some items moving around but otherwise identical. The only real difference is in the USB/LED daughterboard, which was redone with fewer connections. The shell is also smaller, preventing a 1:1 swap or replacement.
JDM-020
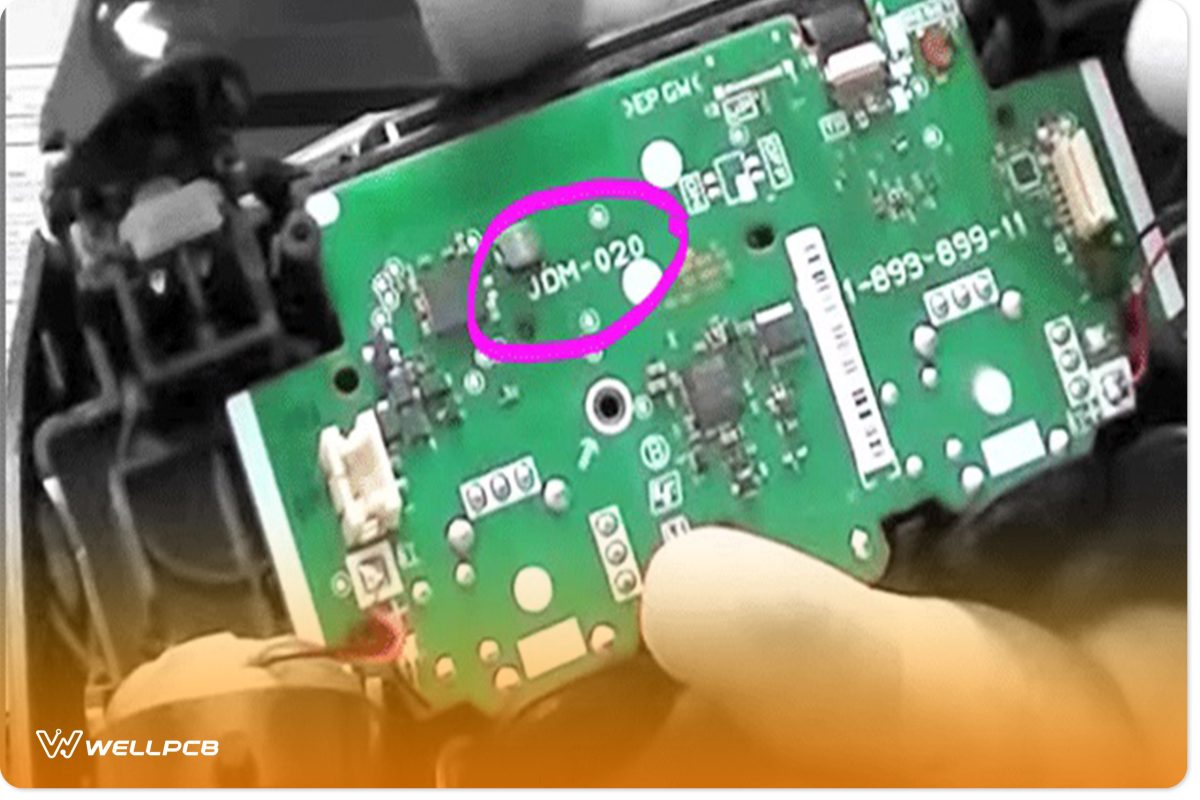
The JDM-020 is the current release circuit board texture for the primary PlayStation 4 console. It features a Freescale ARM chip instead of a Fujitsu one.
It is the first to implement blind vertical interconnect access (via) points, or links between the layers of a multi-layer PCB, for the daughterboards, buttons, and connectors.
The via for the X and triangle buttons are on the bottom of the board, while Circle and Square are on top. The 020 also updated the daughter circuit board texture and shell.
The daughter sits as two pieces connecting to the main board’s sides instead of in the middle, as they did in previous revisions.
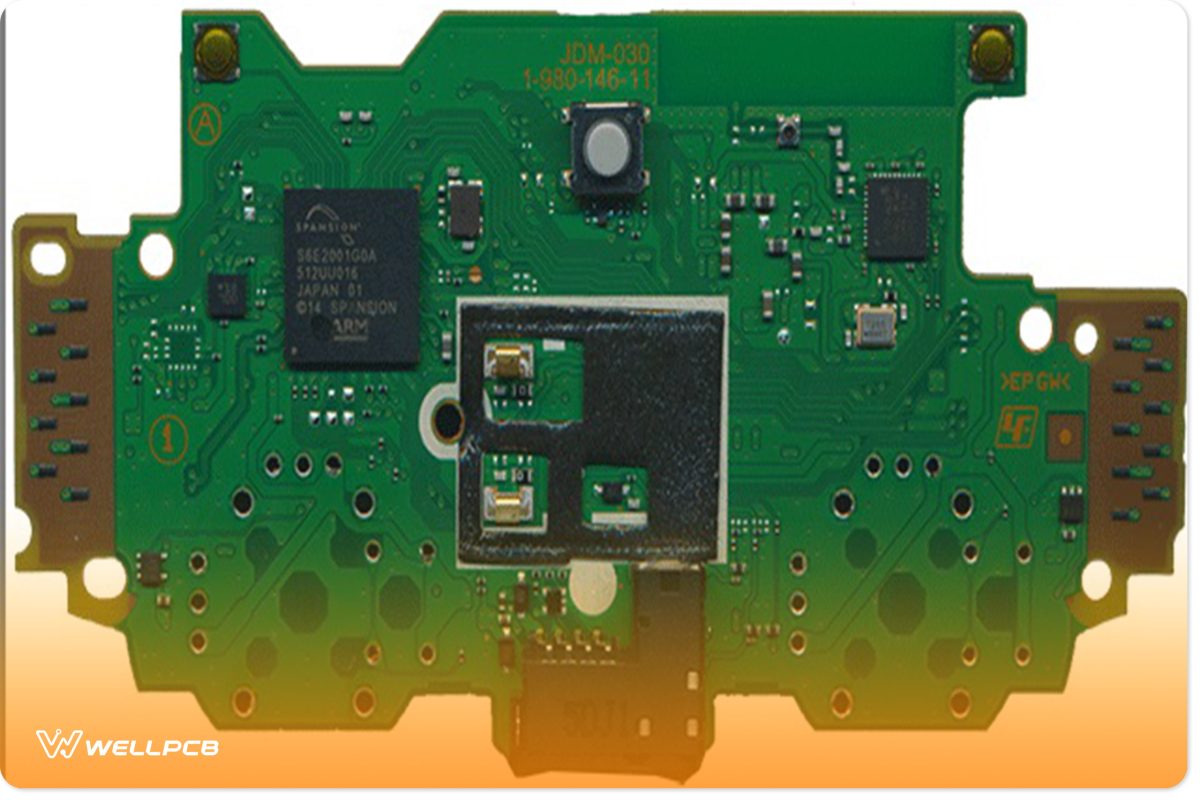
JDM-030
The latest slim console controller, the JDM-030 circuit board texture, has a shell and daughterboard redesign.
The 030 daughter is a single PCB connecting to the mainboard’s top left.
JDM-040, JDM-050. And JDM-055
Only minor differences separate models 040, 050, and 055 from each other.
The button vias are now near the top right side of the board and allow any ground line to serve as connection points for the buttons.
PS4 Controller PCB Parts
Regardless of the build version, the PS4 controller board takes the user input from the buttons and translates them into something the game console’s software can use.
Mostly, all PS4 controller PCBs use standard circuit board texture components. There are resistors, capacitors, transistors, and the like.
These standard electronic components make up the bulk of the PCB.
Their job is to ensure the button, USB, and wireless signals arrive at their destinations on time and as intact as possible.
Beyond those fundamental parts, all PS4 controllers share standard user interface components.
The number of these components may vary, but they all have the same primary function.
Button, Triggers, and Directional Pad Switches
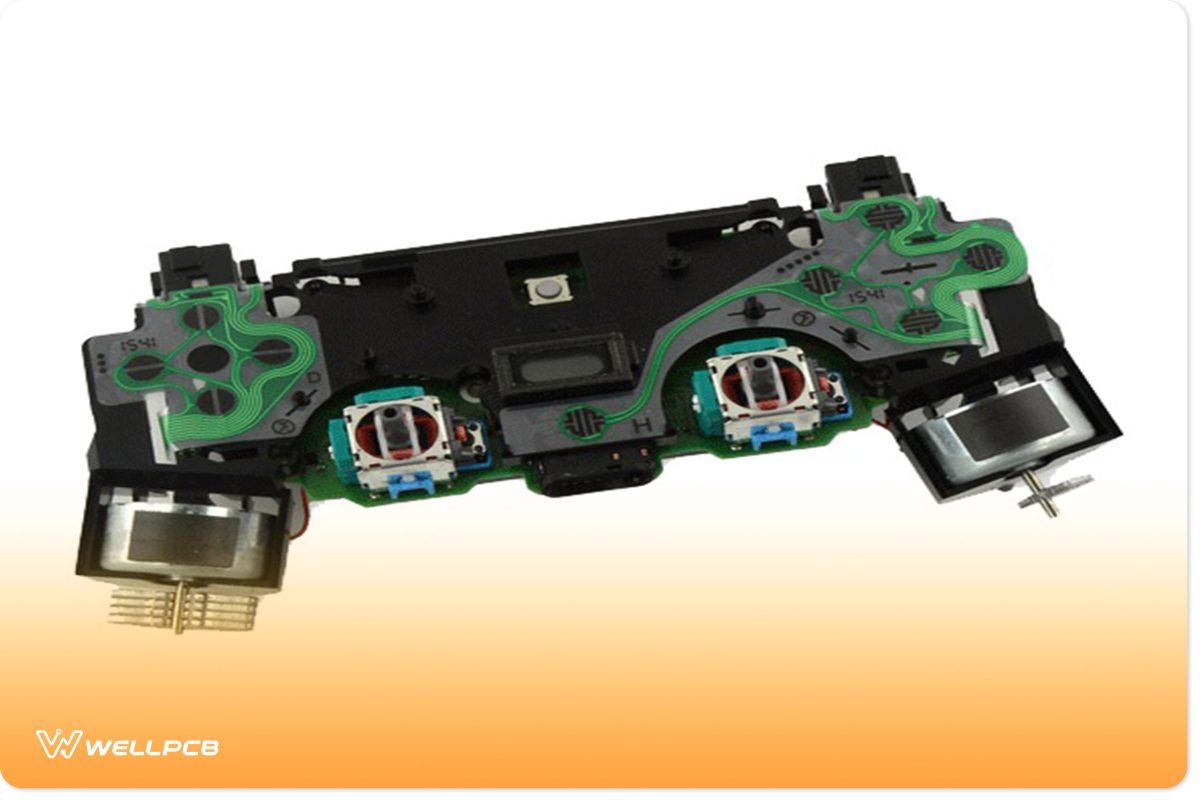
Like on a computer keyboard, the PS4 button switches are not the PCB but the buttons themselves.
These switches are conductive pads that strike the PCB when pressed, completing a monitoring circuit.
This circuit is on the daughterboard, with conductive leads where the buttons press down.
Analog Stick Modules
Every Dual Shock 4 controller has two analog directional sticks. One is attached to the daughterboard, with the other connected directly to the mainboard.
For the most part, the sticks come as complete modules, though you can also find them in individual pieces.
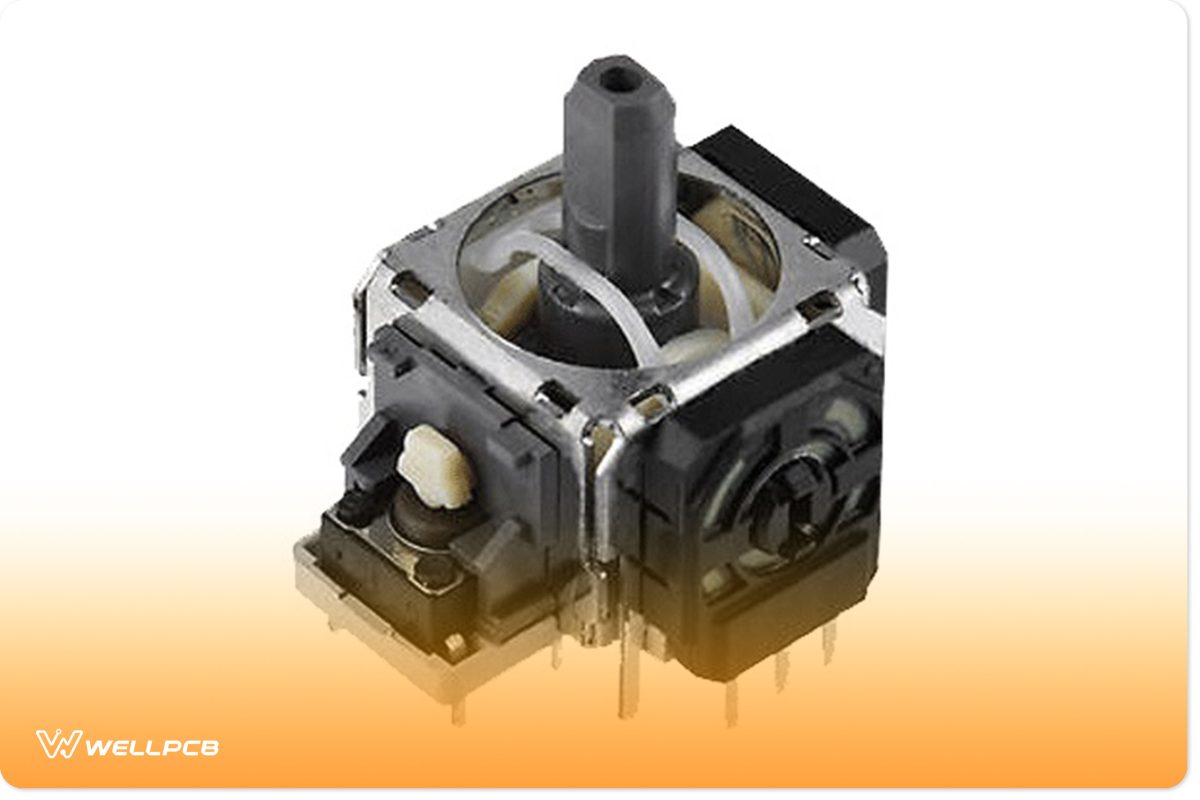
Each module has
- Sensor wheel and housing
2. Springs
3. Stick the tact button
4. A plastic stick
Battery holder
Upon opening the shell, the battery compartment is the first thing that pops up. There is nothing special about it, though.
It is just a standard plastic battery holder designed to fit the case. It connects to the main circuit board texture through a plug.
Lightbar
The PS4 Controller has a built-in light bar that offers an additional point of interactivity in some games. Encased in a glass covering, the bar attaches to the Controller through a clip, which connects to the PCBs through a cable.
Mounting Plate
The PS4 controller PCB does not attach directly to the shell. Instead, it attaches to a mounting plate for stability.
This plate directly connects to the body to hold everything in place.
Rumble Motors and Wheels
Rumble motors provide user feedback features in some games. A typical controller has two, consisting of the engines and the wheels, that give the user feedback.
Speaker and Audio System
PlayStation controllers have a basic audio system as well. These systems include a speaker and its driver circuit.
Touchpad
With the control sticks, a directional pad, a trigger, and buttons, you can control PlayStation 4 games with a touchpad. The touchpad assembly is on top, in the middle of the daughter circuit board texture.
USB Port and PCB
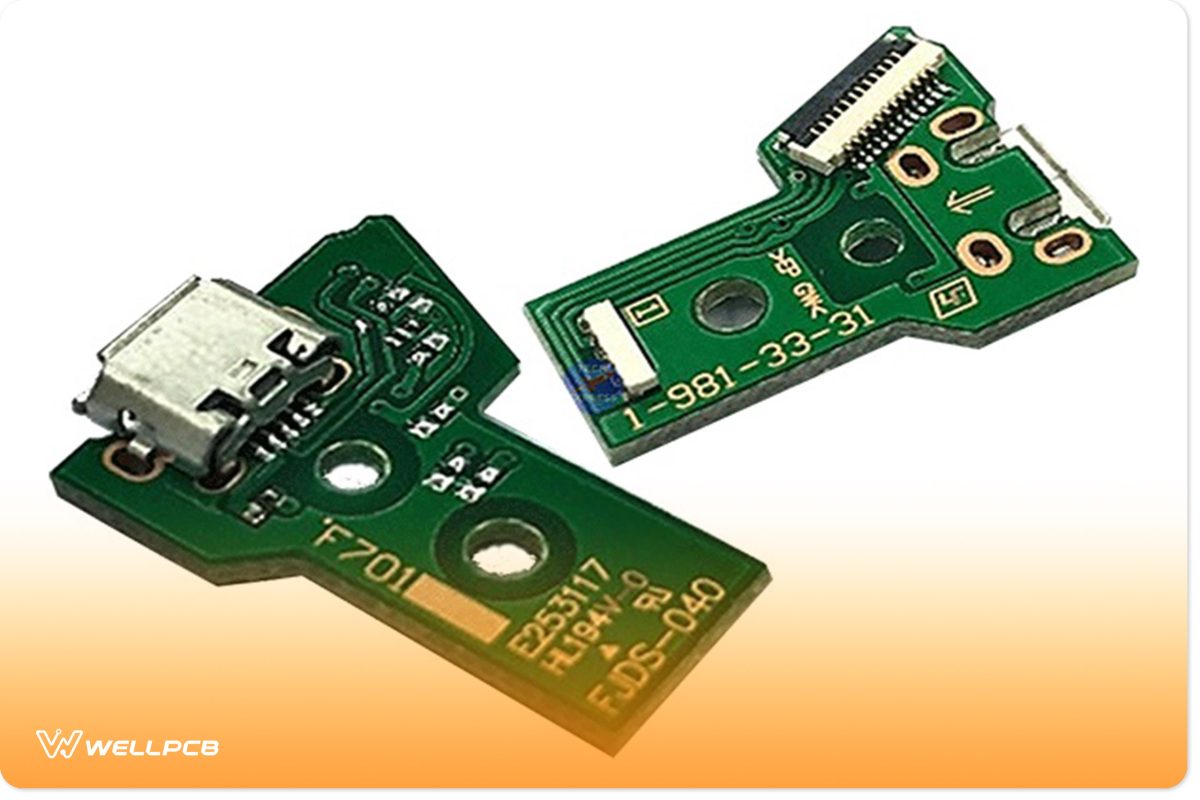
The USB assembly allows the Controller to connect to USB ports on consoles and computer systems. It also serves as the battery charger port.
The USB PCB is custom-made to fit the Controller but uses USB-standard components.
Cooling Fan
Like most electronic devices, a PS4 controller has a built-in cooling fan.
Bluetooth Wireless antenna
As a wireless device, the PS4 Controller also boasts a wireless antenna and associated circuitry.
ARM Processor
Finally, as a wireless device, these controllers also feature an ARM processor integrated circuit.
These chips are the hearts of the controllers, operating all of the Controller’s functions without input from the console.
PS4 Controller PCB Buying Guide
Now that you know what you need, you can complete your plans for a custom gaming pad, though this knowledge would serve you well if you need to replace a few broken parts.
Even with this knowledge, you still need the parts before completing the project. Asking Sony nicely will not get you very far, either. They have no incentive to sell their stuff piece mail.
You must get your PS4 controller PCB parts and board from a third-party manufacturer.
Of course, you want to find the proper manufacturer. While you should always consider pricing, cost should not be your only concern when buying after-market components.
Some things you should consider when buying video game console parts, including stuff for the PlayStation 4, include:
PCBs with high tolerance standards.
PS4 controllers must withstand many hours of play, requiring circuitry to handle the strain.
High-quality parts and materials.
You need reliable parts made from quality materials sourced from reliable vendors.
Excellent customer support.
Therefore, you want a trustworthy manufacturer to deliver them and help you replace them when they break down.
Quick delivery times.
You want a supplier to deliver your PCBs and parts on schedule, reducing project delays and inconveniences.
We are building a gaming device. You should expect the parts you put in it to have the design and capacity to handle that environment.
You also want the assurance that every part you buy is certified and tested to work with all PS4 consoles and accessories.
Automated PS4 Controller Construction Available
It would help if you also considered PCB automation. PCB automation takes raw materials and makes your entire PCB assembly with a push of a button.
You must stand and wait at the end conveyor for your finished product.
The process allows for the mass production of PCBs that meet Sony’s PS4 controller circuit board texture specifications and requirements.
Conclusion
We have PCB automation machines that will increase the production of your PCB semiautomatic equipment.
Our system uses a standalone router to route your PCBAs into independent assemblies, allowing you to produce and accommodate more PCBs.
We even have the Laser Singulation system for building flexible circuit board textures.
That way, you can work with multiple designs at the same time.
We will even help you choose the best parts for your project, ensuring you enjoy your creation and have the best gaming and customer experience with us.
If you need to manufacture or assemble your controller PCB, please get in touch with us without hesitation; we will try our best to provide you with the best service.


